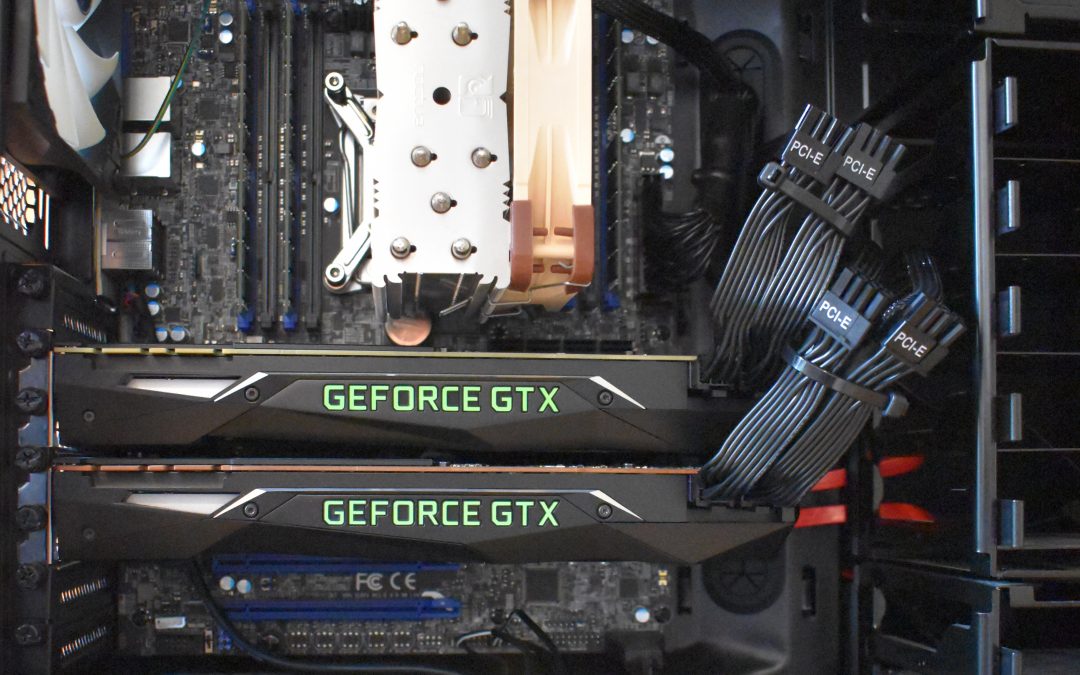
This high-end dual-GPU setup was rebooting randomly, can you guess why?
Hint: Two components were bad and causing similar symptoms.
Troubleshooting hardware-related issues is not as straightforward as it seems. Random freezes, reboots and shutdowns are the hallmarks of hardware failures, and most of the time they will occur randomly when they are the least expected, e.g. during idle. They can also occur during gaming and heavy CPU/GPU compute, which makes troubleshooting slightly easier.
Answer: The PSU (850W) was underrated and an ECC RAM stick was faulty.
Tale of a new rig
You just put together your $(insert a three- to five-figure amount) new rig, booted into your preferred operating system and installed your tools and games. Everything looks smooth and fast, you hear the fans spinning up and a little coil whine when the machine does something that is obviously important, and you think that it may actually be alive with a temper of its own (which may or may not be a good thing).
And then, out of nowhere, BOOM!
It just rebooted. Worse, it turned off. Or perhaps you got a BSOD or a kernel panic. What the heck? Retailers say that less than 2% of computer parts are faulty. Surely this is a software error, or is it?
Many things can go wrong when testing a new system, and it can be quite difficult to find out which components do not work well. This is because most faulty parts will not be fully dead, instead they will appear to work well for some time and then fail, either randomly or with increased system load and temperature.
I have been dealing with tons of hardware failures in the past, including ‘esoteric’ failures that would randomly occur once every month, or things that you would never guess such as this brand-new and reinforced SATA cable that works flawlessly with some HDDs but not others, or even a bad USB hub or mouse. It is not always possible to determine exactly what parts are wrong, and the process of determining what is wrong in a system almost always involves some form of guesswork. This uncertainty will often make it difficult to get parts replaced or refunded by retailers, who will happily charge you a fee to return your goods back to you when they find that they work correctly. The truth is, depending on the manufacturers and type of hardware, an average of 20 to 25% -one every four to five- of computer parts actually exhibit a hardware fault of some sort, which is not always obvious at first. These parts, which normally passed manufacturer tests and quality control checks, will still give you an ocean of random crashes and a few headaches. Perhaps manufacturer tests are incomplete, or the parts get too often damaged during transit, who is to blame?
In this post I describe how I deal with all sorts of hardware failures and how I identify faulty components. This will also hint us about the context of failure, in other words, what makes a particular component fail, so that we can tell RMA departments how to reproduce the faults when we return computer parts.
The lucky, less lucky and unlucky outcomes
After assembling a new system, there are three possible outcomes:
- The lucky outcome: It works flawlessly. You can stop reading. Disclaimer: This has never happened to me yet.
- The slightly less lucky (but still lucky) outcome: It does not work at all, the system is dead-on-arrival (DoA). Just return all the parts for a full refund, or remove each part one by one until you find out what works and what does not. Return what does not work. Get replacement parts. End of story.
- The unlucky outcome: It appears to work but not all the time. Freezes, reboots or shutdowns occur randomly. If you’re not too unlucky, crashes will coincide with the use of a specific component (e.g. the GPU) or with a specific use case (e.g. gaming or heavy compute).
Are hardware faults really random?
Short answer: For the most part, yes, with some variations.
Determine when faults occur
While most faults will exhibit some sort of randomness, it is important to be as specific as possible and tell if they either ‘always’ or ‘frequently’ occur during a specific use case. if faults are tied to a particular use case, it will be easy to narrow down what component is affected. However, if faults appear to occur randomly with no difference between idle and load, it will be harder, but there are still things that can be done. In general, the more random is a fault, the more difficult it will be to determine which component it originates from.
Truly (seemingly) random faults
Some faults will appear to be truly random, e.g. they will NOT depend on system load, temperature or the use of a particular component. This can be the case with more expensive server RAM such as LRDIMM when there is a suspected issue in one of the buffering chips. In this case, RAM errors will not be tied to a memory region and could occur once every month, no matter if the machine was idling or fully loaded. Memtest and ECC may not even detect this kind of faults: It will just crash when it comes.
Faults that depend on a component
Some faults are conditioned by the activation or use of a specific system component such as a GPU. These faults may still occur randomly once the component is in use (gaming or compute for a GPU), however with proper testing it should be easy to determine which component is faulty. In the case of a GPU that appears to be faulty, we often find that the PSU was the component to blame (bad or underrated PSU).
Faults that depend on system load
Other faults may occur during system load or with increased temperatures (or both) while no specific component gets activated apart from the CPU and the RAM. In general, these faults will have a high chance of coming from the RAM, motherboard or CPU (in order of likeliness). They may or may not exhibit a random behavior in the sense that they may occur immediately once a system load threshold or temperature has been reached, or some time after.
Common culprits: PSU, temperatures, RAM, motherboard, CPU, storage components, USB controllers
Random guy just put together his new rig, launches a game, it crashes. He opens his favorite forum and asks for help in a lengthy and ultra-documented post.
He gets his first reply 5 minutes later from another guy who obviously didn’t read his post fully. That’s a one-liner: “Have you tried with a different PSU?”
As irritating as this answer sounds, it is the right question to ask. Testing the PSU is almost always the right thing to do when a system does not work well.
Important: Before trying any of the steps below, UNPLUG everything unnecessary from the machine (webcam, headset, additional storage controllers, etc.), test your keyboard and mouse on a different computer (a laptop is fine), and re-plug them into a different USB port. Load BIOS defaults (‘factory defaults’ or ‘optimized defaults’, it does not matter which one you choose as in both case, it should -almost- always work). Do not alter any BIOS settings if there is no good reason for it. You may have to disable integrated devices and increase voltages later on.
The PSU
The PSU has a central role in a system. It provides current to needy components while maintaining a stable voltage within a narrow range. Launch your favorite game in full HD and you instantly open a ~250W tap from your PSU. Things will often go wrong during the ‘opening’ of the tap. As the current draw significantly increases in a blink, the output voltage of the PSU is transiently reduced. The PSU will quickly work its way to raise the voltage up. Good PSUs will handle this situation smoothly. Bad PSUs will not be able to compensate the voltage fast enough, as a result the voltage may transiently leave the narrow range that it was allowed to stay in. Underrated PSUs will either shut off or reboot to protect the machine (which is a good thing), or in the worst case scenario, not be able to compensate the voltage at all, and feed your system with a voltage that is too low and possibly causing all sorts of artifacts, including melting power cables. When components do not get the stable voltage that they were designed to work with, they act in a funny way, resulting in all sorts of crashes. Sometimes there can be differences between different operating systems: A game may work well on Windows but not on Linux. This does not exclude the PSU at all. Different operating systems have different driver implementations, which changes how the system draws current from the PSU.
Step 1: PSU. Make sure that your PSU is good. Have a spare ‘known-good’ PSU in your drawer (seriously). Testing a system with a good PSU is a no-brainer and solves a lot of issues. If you don’t have a spare PSU, order two PSUs right from the beginning. If all works well, return the PSU that you did not use. The extra return fees will be worth the trouble if you have bad hardware. Do not trust vendor recommendations for PSU wattage. If a vendor recommends a 600W PSU, get a 800-1000W PSU. High-end GPUs are known to have huge power consumption peaks that routinely exceed their wattage specifications by a fair amount. This causes a lot of confusion for people who think that they can just sum up 150W for the CPU, 250W for the GPU and ~200W for the rest of the system and find that they just need a ~600W PSU. Get much more than what you think your system will need, seriously.
The temperatures
The second most common suggestion is to check the temperature of the system. If the temperature rises above a certain limit, lots of weird things will happen in the silicon. This will normally never happen thanks to thermal protections in the CPU and other components. I would normally say upfront that a hardware fault is not an issue with the temperature. A component that crashes at higher temperatures is bad, and lowering the temperature through better cooling will only treat the symptoms, not the cause. The component will remain bad even at lower temperatures, but will most likely crash less frequently. Again, good components don’t crash when they get too hot, they throttle. However it is still worth having a look at the whole temperature spectrum. Some people struggle with the notion of high temperature, and are left wondering if their system could be crashing because the CPU is merely hitting 60 degrees Celsius. The answer is no, it should not crash at this temperature. Operating temperatures vary for different components so it’s hard to tell. You will normally be safe if your CPU stays below 90°C, your RAM below 80°C and the motherboard peripheral temperature below 75°C. This is seriously hot, but still safe, and by safe I really mean that it should not crash at all, even though your components will not last as long as you want if you keep them as hot. Actually, it should not crash at all even if temperatures keep rising, as thermal protections would kick in to throttle the system. Checking temperatures and inspecting cooling equipment remains a good practice. There is still a little possibility that a thermal sensor is faulty (reporting lower temperature values and delaying throttling mechanisms), or that the cooling equipment is faulty (e.g. slanted surface for a heatsink), cooling properly the area near a sensor but not the rest of a chip and resulting in a large temperature difference between that reported and that truly occurring in the silicon.
Step 2: Temperatures. Check the temperatures from all available sensors. If it’s obviously too high, get a visual confirmation that the fans are spinning. If it’s still too high, visually inspect the heatsink and its surface for dirt and irregularities. Return any heatsink that looks crooked or that has irregularities on its surface. Was the thermal paste applied homogeneously, without gaps? If you find that the pad left by the thermal paste is narrower on one side than the other after heatsink removal, check for loose screws, make sure that the mounting holes are sound, and have a good look at the overall fit of the heatsink. The surface of the heatsink may be slanted, which may not be obvious at first. Search for images of your heatsink model, and compare your installation with what you find on the internet to see if there is any deviation.
The RAM
Bad RAM is one of the most frequent issue when putting together a new system. Fortunately, it is generally quite straightforward to test. Great software such as MemTest86 (at boot time) or memtester (Linux command-line; Have you got any recommendations for Windows and MAC? Please share!) are a must if you suspect bad RAM. Once faults are found, it is generally easy to get the RAM replaced. However in some cases (read ‘for the very unlucky’), the RAM will appear to work flawlessly while still crashing the system randomly. This kind of fault is quite rare, and most people will have at least two RAM sticks, therefore it is quite easy to test too but will require plenty of time. Here is how to test for suspected bad RAM when everything else works, including hours, days and even weeks of successful memtesting.
Step 3: RAM. Remove all RAM sticks but one, and use the same RAM slot every time you swap a RAM stick. Let your system run for at least a few days. Try again with a different RAM stick. Repeat until you find out if it makes a difference. If this procedure gives you an unstable system for more than one RAM stick, repeat the procedure with a different RAM slot. If the system remains unstable no matter which RAM stick and RAM slot you used, and it does not make a difference at all after a few days, then the RAM is most likely fine. You may find that RAM sticks fail only in specific slots or when combined together in a particular way. If this is the case, the RAM may still be good, read further.
The motherboard
Motherboard faults are a real killer. A faulty power circuitry in a motherboard will really give you a bad time, and it’s hard to diagnose but still quite frequent. The CPU, RAM and all other chips integrated on the motherboards will get their power through the motherboard, which includes additional regulation components after the PSU. Even GPUs get some or all of their power from the motherboard, up to 75W through each PCIe slot. No doubt that a bad motherboard will make you go crazy. This can further lead to weird crashes that only occur when using a particular arrangement of RAM slots, or when running specific CPU instructions due to how they draw current from the motherboard power circuitry. Other motherboard faults could target integrated devices, improperly soldered connections and bad connector blocks.
Step 4: Motherboard. Update the BIOS to the latest version, or downgrade to a previous version if it’s already up-to-date. Unplug everything else, including chassis’ cables for USB and audio connections (just keep a graphic card if you don’t have an integrated video output, and the power button cable from the chassis). Check voltage sensors in the BIOS, make sure that reported values look coherent (they will vary due to auto-voltage regulation). Disable all integrated devices in the BIOS and use a clean operating system without any manually installed drivers, unless there is a specific known issue about the motherboard requiring a particular driver to work properly. This is very sensible as we have seen too many times buggy drivers for motherboards causing random crashes, including drivers for integrated storage controllers. Check that there are no screws stuck between the chassis and the board. Make sure that there isn’t any metallic objects around the surface of the board too. Verify that the motherboard is seated properly, does not bend and that there is no significant pressure point. For this, visually inspect the motherboard surfaces and keep an eye for bad solder bonds by comparing similar components together. As a rule of thumb, if a fault still occurs randomly at this stage, and you know that the RAM and the PSU are good, then it is likely an issue with the power circuitry of the motherboard. It may also be a problem with the CPU.
The CPU
CPUs can be faulty too. More specifically, the Integrated Memory Controller (IMC) of the CPU may be at fault. If this is the case and you’ve done Step 3 and Step 4 correctly, then you probably found that all RAM sticks behaved the same, or that there is a particular RAM disposition that will not work well. Here is how to test further.
Step 5: CPU. If you have an Intel CPU, run the Processor Diagnostic Tool from Intel (https://downloadcenter.intel.com/download/19792/Intel-Processor-Diagnostic-Tool). If all tests pass or if you have an AMD CPU, I recommend to increase the IMC voltage setting (generally found in the BIOS or through motherboard-specific software) by ~10% (e.g. from 1.1V to 1.2V). If it does not make a difference, try also increasing CPU voltages (there will be many different settings). For this, browse overclockers’ forums to see how they achieve stability with their systems. But don’t overclock your system yet, and avoid increasing any of the voltage settings by more than 10% to stay on the safe side. If increased voltages make your system stable, we still can’t tell if the issue comes from the CPU or from the power circuitry of the motherboard (or it could be both), but at least you know that the rest is most likely fine. It may be a faulty voltage sensor, resulting in incorrect voltage regulation. You will need to swap the CPU or the motherboard to find out which one of the two is truly faulty.
Storage components
Storage components include additional controllers, HDDs, SSDs and data cables (SATA or SAS). Faults caused by storage components are also quite common and it would really take a full post just to mention the most common cases. Relevant examples include bad SSDs that cause sudden reboots, with or without data corruption, and faulty or badly designed data cables causing electrical artifacts. You may hear time to time about this incredible dust particle that crashed a full data center during a RAID rebuild on a full moon. More seriously, all sorts of funny things can happen with storage components so it’s important to make sure that your system works well before adding new storage parts.
Step 6: Storage components. Test different data cables, different data ports, unplug any non-essential HDDs or SDDs. If you are just using the motherboard storage controller and you have done Steps 1-5, disable the storage controller in the BIOS and boot your machine from a USB drive.
USB controllers
This one is quite easy to determine, but still worth mentioning. If a machine crashes when plugging in USB devices, you may want to have a look at USB options in your BIOS.
Step 7: USB controllers. Make sure that you are using a clean operating system without any manually installed drivers for the motherboard. Get a ‘known-good’ device such as a mouse or a USB dongle, and test all USB ports one at a time. Determine which ones are faulty. USB ports may be color-coded if your motherboard includes multiple USB controllers. Check in the BIOS or motherboard manual which USB ports correspond to which USB controllers, and see if that makes sense with the ports that you found faulty. It is quite rare to get multiple faulty USB controllers. If you found multiple faulty USB ports from different controllers, then you most likely have a faulty power circuitry or a bad motherboard connector block. If you found that all faulty USB ports belong to the same USB controller, then you pretty much nailed it down. Disable this particular USB controller in the BIOS and test again. Embedded devices on the motherboard may also be connected through USB internally, so it could help to disable these devices from the BIOS when you test the USB subsystem. Albeit not impossible, it is really hard to believe that a motherboard with a faulty USB subsystem would pass manufacturer tests.
Practical example: System crashing when using the GPU
The second section of this post was motivated by a GitHub issue where a user experienced reboots when using his GPU with TensorFlow, a compute framework. GPU compute is quite stressful for a system, it is much like gaming in 4k resolution with all graphical settings maxed and hundreds of characters around.
Original issue (‘Machine restarts when running TensorFlow with GPU’): https://github.com/tensorflow/tensorflow/issues/8858.
That’s how I would proceed to determine the cause of machine reboots.
Machine rebooting or shutting down without any logs
Depending on the BIOS settings, the machine may or may not restart on power resume, and may or may not produce a hardware ‘Power On’ event in the System Event Log (SEL; for server boards only). So when we are talking about random reboots, it could as well be random shutdowns. Without any log entries, we first test the PSU, then the GPU, and keep an eye for bad RAM or a bad motherboard.
Most probable cause: Underrated PSU cleanly shutting off to protect the system during overload.
Symptoms: Random reboots or shutdowns soon after the GPU starts to run.
Solution: Replace with a higher wattage PSU.
Second most probable cause: Underrated or bad PSU delivering unstable voltage due to high current transients or overload or both.
Symptoms: Random freezes (more likely) in addition to ‘clean’ reboots or shutdowns described above. This could also occur outside of TensorFlow, e.g. during CPU and RAM use.
Solution: Replace with a higher wattage PSU from a reputable brand. Check cables and connectors, they may have started to melt.
Third most probable cause: Faulty GPU, RAM or motherboard.
Symptoms: Random freezes, reboots or shutdowns. Bad RAM would cause these issues outside of TensorFlow if used heavily. It may give away some log entries time to time. A bad power circuitry on the motherboard would likely cause additional issues when using the CPU and RAM.
Solution: Move the GPU to a different PCIe slot. Try a slower (x8) slot. Test the RAM (see Step 3 in the first part of this post) without the GPU. If you have a multi-GPU setup, test one GPU at a time. Test a game under a different operating system. Test the GPU with a power limit and a lower frequency (see nvidia-smi command in Linux). If it works with a different PCIe slot or with a power limit and lower frequency and you are sure that the PSU is good, you may have a bad motherboard. If the system remains unstable, the GPU should be tested in a different machine, or a different GPU should be tried.
Other possible causes: ‘Esoteric’ PSU faults such as an issue with the overcurrent (OCP) / overload (OLP) circuitry causing the PSU to shut off too soon for no good reason during fast current transients, a bad power cable (would be fixed by replacing the PSU and the cable set), a driver issue (this can be eliminated by upgrading the driver or if you find other users with similar hardware and they don’t experience the issue at all), a bad CPU (rare).
Machine freezing without any logs
A freeze is quite different from a machine reboot or shutdown. As mentioned above, a bad PSU would likely cause system freezes. Bad RAM is the second thing to look for when you are sure that the PSU is good and your system randomly freezes. Last thing, check the GPU. See the section above for more details.
Machine crashing (freezes, reboots or shutdowns) with logs
If the machine is able to log anything before it becomes unresponsive, this is most likely a RAM issue. For desktop-grade components, you may find various errors in system logs, about programs or processes that seem unrelated to the task. It can affect anything that runs in a random manner. If you have server-grade hardware with ECC RAM, it should be straightforward to determine which RAM stick is faulty.
Logs that you can check include:
- BIOS Event Log (server boards only; it is located in the BIOS and may have a different name depending on the board model)
- System Event Log (SEL; server boards only; it can be queried via IPMI, e.g. ipmitool sel list)
- Linux regular logs (e.g. /var/log/kern.log)
- pstore (in Linux, /sys/fs/pstore/; these are stored on the motherboard)
- (Have you got any suggestions for Windows and MAC? Please share!)
Concluding remarks
The more components in your system, the harder it gets. It is a difficult task to put a full system together, it is a harder task to test it, and an even harder one to make it work properly. If you have additional hardware devices (controllers, multiple GPUs, etc.), I recommend to test your system with the bare minimum (not even a HDD/SDD), and boot straight into MemTest86 for at least 24 hours. Then add other components iteratively. Otherwise a single hardware crash would prompt you to take apart everything, and there is also the risk of damaging good components if one of the components in your system is seriously bad.
Good luck!
This article has been cross-posted on Medium.
Recent Comments